Wednesday, December 16, 2015

Prototype Pic of the Day #24

NS #1031 | Image courtesy of Steven McKay via RailPictures.net
Its about a week from Christmas here in Michigan and there has been a noticeable lack of snow lately. I was browsing RailPictures.net and came across this great shot of some Norfolk Southern power rolling through a snow covered Cohoctah, MI. I've actually driven along side these same tracks in the past so its kind of neat to see them with some unique power. According to the photographer, this was the first time in 15 years a NS train was on that line.

Saturday, December 12, 2015

Basement Layout: Roadwork

I still don't have all of the track I need to finish my main line run yet, so I've been working on some smaller projects for the layout lately. One of those is figuring out how I want to do the roads and grade crossings. In my last post I showed some work I started with foamcore poster board. Now I've had some more time to play with it and I think I will be using this for sure on the layout.

I've cut a few more test pieces and started experimenting with striping using acrylic paint. I took some frog tape and used two pieces to create a straight line along the center of the road. Then it was as simple as brushing on some yellow in the opening. For a first shot at this, the results are pretty good. I missed on the centering a bit, but this was just a test piece so that's ok.  I'll just have to measure before I put the tape down next time.

Experimenting with road striping.
The straight sections are the easiest so it took a little more effort to get any curved lines to work. To do this, I cut some thin strips of frog tape with my xacto knife and placed them gradually along the bend. The hard part about that was keeping a consistent gap between pieces of tape. I got as close as I could for another test piece and threw down some paint. This one also came out pretty nice.

Painting curved road markings with painters tape.
So far I like what I see with the painting method, so I might just do this for the entire layout. Beyond that, I still need to figure out exactly what I want to do for the grade crossings. The picture above kind of shows what I'm thinking so far. I have both the road and sidewalk coming to the exact same elevation just before meeting the ties. This will leave space for a pre-made crossing to be inserted.

Wednesday, November 25, 2015

Basement Layout: Making Progress

While I'm not exactly as far along as I would have liked by now, I'm still enjoying working on the layout. I've been busy lately with making track plan changes and starting to lay some track and cork down. Now I just need to get out and buy enough track and turnouts to complete the mainline loop. That is my primary goal right now. Once I'm at that point, I can at least have some trains running again and then decided what to do next from there.

One thing I'd like to show here is what I am doing with the cork to differentiate between the main line and the sidings/yard area. Rather than using standard HO scale cork for everything, I've decided to go with N scale cork for the sidings/spurs and in the yard areas. This should give me a bit more of a prototypical look with the main line sitting just a bit higher than everything else.  

After I bought a few pieces of cork to get started, I realized that to make a 3 foot long section in N scale thickness, I can just take a third strip of N scale cork and put them all together. This turned out to be almost exactly the same width as the regular HO size, so I think I will go with this, at least for the lower sections of track that aren't grouped close together. For those areas, primarily the yard, I will probably have to go with sheet cork. 

Here is a look at how the three pieces of standard N scale cork line up with HO scale.

Comparison of three pieces of N scale cork and two pieces of HO scale cork.
I've also been working on some other small projects, one of which is figuring out what to do for the roads I need on my layout. I want something that looks good, but can be made from readily available materials. That led me to doing a quick YouTube search and I came across a great video from Gknos modeltrains. This video shows how roads can be made from simple foamcore poster board. I've been trying it out and have to say I like the results so far.

Messing around with some foamcore poster board to create roads and sidewalks.
For the main road section in the center, it is just a 3" wide strip of foamcore board with the paper removed from both sides and painted with some grey acrylic paint. The sidewalks are the same, only they are sitting up on a piece of thin foam sheet. This did a nice job of simulating the sidewalk being at curb height. The seams in the sidewalk were done by cutting slightly into the top surface with my xacto knife. Now it just needs some striping and weathering.

Monday, November 16, 2015

Basement Layout: First Turnout and Another Track Plan Change

Things are coming along nicely with this project so far. I'm going at a pace that I'm comfortable with and fits well within my spending budget and available free time. So far I've really enjoyed the process and I'm looking forward to learning as much as I can as progress is made. 

This past weekend I made a trip to the local hobby shop and picked up my first turnout. I bought an Atlas Super-Track 83 #6 left hand to get started with the siding that will connect to the scrap and lumber yard spurs. I decided to go with #6's anywhere possible to hopefully avoid derailment issues down the line and also have a more prototypical look. 

A look at my new Atlas turnout.
While my track is far from permanent at this point, I've got this new turnout test fit and ready to be installed. It was pretty simple in that I just had to remove the end ties and cut some flex track to line up properly with the diverging route. I'm happy with the look and functionality of it so far after some preliminary run by's with my new Bachmann GP40 and a few of my Intermountain D&M boxcars. 

Now, as far as the track plan change, this came about after doing the test runs over the turnout. Once I marked the centerline for the main that runs along the edge of the table, I laid down the cork along it then added the track. It turned out to be way too close to the edge for me, so I've decided to eliminate one of the yard storage track and shift everything a bit so I can have another inch of room between the edge of the track and the edge of the table. 

Revised track plan.
I also changed the industrial area a bit so there are now only two spurs: one for the scrap yard and one for the lumber yard. I was hoping to squeeze in three different industries, but I felt like it would be too cramped so I will just go with the two for now. Plus, this makes for one less turnout in that area so that's a few extra bucks I can spend elsewhere.

Saturday, November 14, 2015

Side Project: Toy Train Table Update

Well, I have another project I can cross off my to do list. I'm really happy with the way this one turned out. Its actually been done for a few weeks now, but I'm just getting around to taking pictures of the finished product. My son loves it and has been playing with it every day so there is a bit of wear and tear already. 

The finished toy train table.
We've been slowly adding to my son's collection of wooden locomotives as he's been really into the whole Thomas & Friends thing lately. He loves both the toys and the movies. I couldn't be happier because Thomas is what got me into trains when I was about his age so its nice to continue with and enjoy it together. 

So far we've got him the Thomas engine along with Trevor (right) and Gator (center). There are just so many of these things out there and actually pretty expensive for what they are. I'm hoping to add a few more along with some additional rolling stock so he can have some nice looking trains to run around the table.

Friday, November 13, 2015

Prototype Pic of the Day #23

LSRC #304 | Image courtesy of Jim Guest via RailPictures.net
Its been a while since I've posted one of these, so now seemed like a good time to do so. Today's picture is another one featuring the Lake State Railway. This photo was taken at the Thunder Bay River bridge in Alpena, MI near the LSRC yard. I really like the new paint scheme the LSRC has for these two and a few other locomotives. Hopefully they will be available as models from one of the manufacturer's one of these days.

Tuesday, November 10, 2015

Basement Layout: Revised Track Plan

Just as I thought I might do, I've gone ahead and redesigned some of my track plan again. This isn't as much of an overhaul as last time, it was more fine tuning that anything. There were some areas that I wasn't a huge fan of, so they had to be tweaked sligthly. I'm still at the point where I don't have all the track bought, so I can easily get away with making these changes. I just hope I don't need to make many more.

Here is the revised track plan:

Revised track plan in SCARM
The biggest difference here is the yard. I decided I did not want the yard tracks running at an angle to the edge of the table, so I moved them outboard of the main line (blue track) and made them parallel to the edge of the table. I also moved the turntable and roundhouse to the opposite end of the layout as this just seemed to flow a bit better.

I tried to make these changes with some minor operations in mind. I don't plan on anything too elaborate, but I would like my railroad to serve at least some purpose. That's why I still left the main line as a loop so I can just let trains run if I want. I know that's not completely prototypical, but it's my railroad and it works with this being my first layout.

Tuesday, October 20, 2015

Basement Layout: Trains are Running

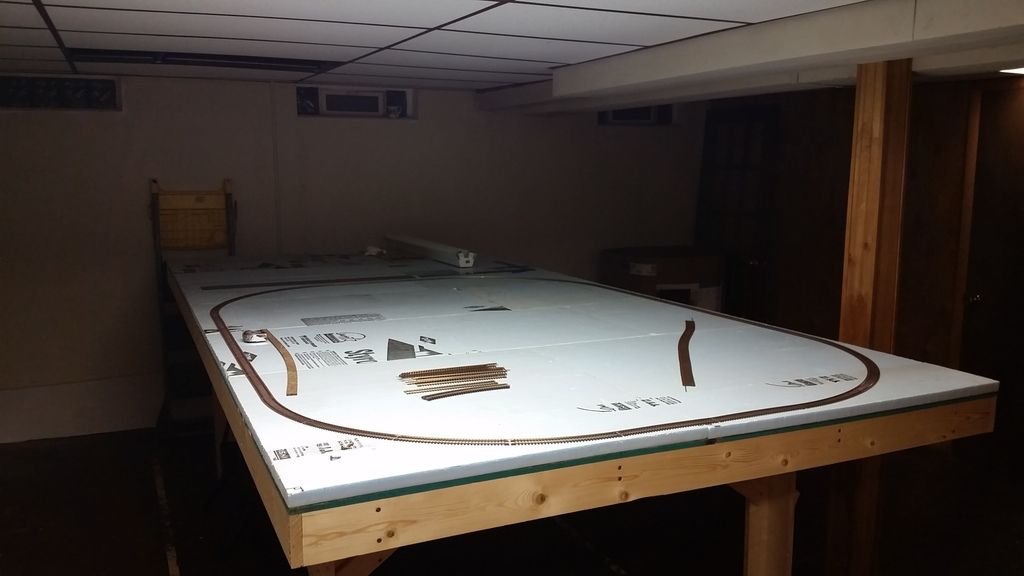
Finally, I can say I have trains running on my layout. This is something that I haven't been able to enjoy since I got back into the hobby around two years ago. Even though I just set up a simple loop of track on top of my layout, it was still exciting to get things moving around. 

Below is a video I took of my new locomotive's maiden voyage on the layout. Sorry if the camera is shaky, it was taken with my smartphone being held in one hand.  In all the years I've been blogging here about trains and hockey cards (my other blog), this is surprisingly the first video I've ever taken and posted myself. Hopefully I'll be able to get some more footage once I have the layout a little further along.


Now that I have this out of the way, I can start thinking about how I want to proceed. I think I need to start buying some cork roadbed and some more track so I can at least start building the actual perimeter of my track plan. That means I need to make a decision on what type of turnouts to go with. I know I want to be able to throw them manually, so that makes it a little easier. I'll have to see what the hobby shop has in stock next time and go from there.

Friday, October 16, 2015

Making the Switch to DCC

I finally did it. I bought myself a DCC starter system for my basement layout. I'm excited to get started, but at the same time I've never used DCC before so I don't really know what I'm getting into. I bought one of the lower end starter systems, but that seemed like it was the best option for me as a beginner. 

I now have the E-Z Command system from Bachmann. I did a lot of research before deciding on this particular system. It fit within my current budget and the deciding factor was that it came with a DCC equipped locomotive. I know it's not the highest quality system or locomotive for that matter, but it's just to get started and the price was right at $150.

My new EZ Command system from Bachmann.
I haven't used it yet, but plan on getting it hooked up here soon just so I can get things running. Its been over 15 years since I had any running trains. I still don't have enough track to complete my plan, but enough to put together a simple loop. Hopefully it is as simple as some of the reviews made it seem to be.

Saturday, October 10, 2015

Basement Layout: Making Progress

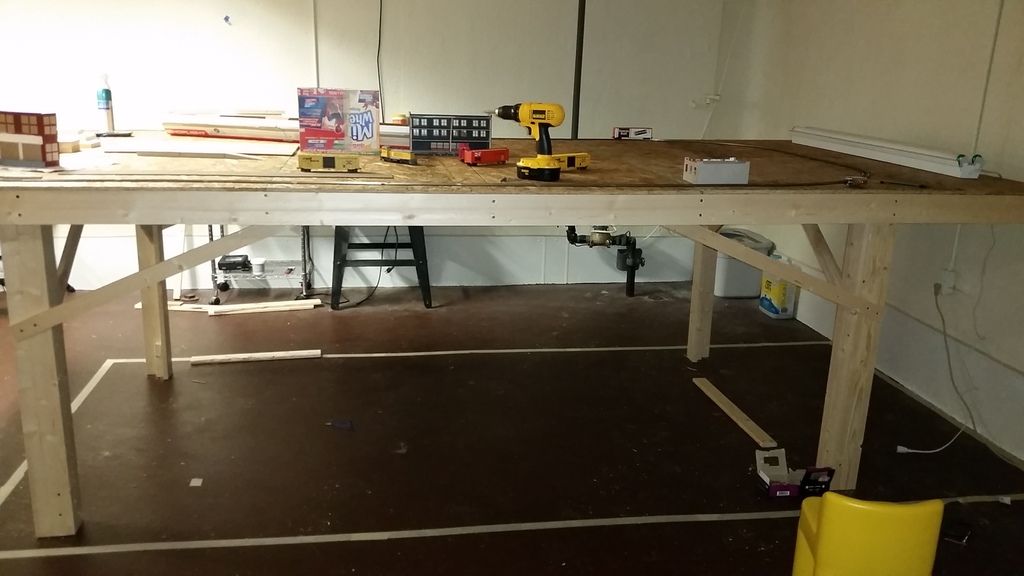
I've been trying to get as much work in as I can on the layout the past few weekends and have made some good progress since my last post. I now have the benchwork completed and a layer of blue foam cut and glued in place on top of the plywood. My next step will be painting the foam an earthy color to help hide the blue when I go to do the scenery. After that it will be time to start laying some track so I can run some trains for fun.

The finished benchwork with added supports. This thing is sturdy as a rock.
Top layer of foam added. Now I can think about laying some track.
I also just bought my first DCC starter system, so I will hopefully have that to play with in the next week or so. I have never actually used a DCC system before, so this should be interesting. The last train I ran was on my old layout as a kid probably 15 years ago, and that was straight DC. Now I can't wait to get started.

Saturday, September 12, 2015

Side Project: Toy Train Table

Since starting my basement layout, I've been in a building mood and decided to make a toy train table for my son who will be two later this year. So far he has been fascinated with trains and he loves playing with the pre-built table that my parents have for him at their house. I didn't want anything too complicated, just a simple table for him to play on with some of his Brio trains. I had a ton of these things as a kid and think its really neat to pass it onto him. 

Using 1x4's for the perimeter frame and legs, I put together a simple structure that was about 3' long and 2' wide. It stands about 13" tall and has a nice lip around the edge to keep things from rolling off the table top. The cross members are 1x3's and the two end supports are pieces of leftovers from another project. The idea is for the table top to be removable. Here are some pictures of the progress so far.

A look at the framework for the table.
Adding the MDF table top.
Test fitting some of the track I had laying around.
I still need to do some touch up work and then paint everything, but its coming along nicely. I am really looking forward to getting this done so we can have another way to enjoy some trains together. He also has me motivated to get my basement layout to the point where trains are running just so he can watch.

Thursday, September 10, 2015

Basement Layout: Benchwork Update

Being on vacation from work this week has allowed me to spend some extra time on this project and I've made some pretty decent progress on the benchwork now. I have all of the OSB in place and just need to add some additional supports underneath then the legs and I should be all set. Here are some progress pictures.

Finished attaching the 1x3 cross members.
Adding the first of six pieces of OSB. I went with 7/16 thick since it was the cheap.
Finished adding the six OSB sheets.
A look at the underside of the table.
A look at where I plan to attach the four legs to the underside.
I am hoping this setup for the legs will be enough to support the weight of the table. It is actually fairly heavy now that its assembled. I may end up having to add a third set of legs in the center just in case. I'd rather over engineer it at this point than deal with sag issues down the road.

Sunday, September 6, 2015

Basement Layout: Benchwork Has Begun

Yesterday I made the first of many trips to Home Depot for this project. I picked up all of the 1x3'x and 1x4's I needed for the frame of the benchwork. While that particular experience at the store wasn't the best I've had, I was able to get everything I needed to get started. It was also interesting trying to squeeze the 12 foot long 1x4's into my Ford Focus. Definitely not the most comfortable drive, but it was only for a mile or so, so not too bad. 

So, in the space that I had taped off I started putting together the 1x4 frame and have all of the main cross supports in place now. The next step will be measuring and cutting the 1x3's to run between the 1x4's for added structure and support. After that I'll need to get a few sheets of OSB and fasten them to the top. Then it will just be adding legs with some connecting supports and I'll be off to a great start. 

Here are some pictures of the progress I've made so far.

Starting to assemble the 1x4 benchwork frame.
Done with the main section of the benchwork.
I'm hoping to get some more done tomorrow having the day off work for the holiday. Then I'm on vacation the rest of the week so my goal is to get all of the wood put together and ready for a layer of foam board before the end of the week. As long as I have the table top ready, I'll be happy since I'll be able to start playing with the track I have.

Friday, September 4, 2015

Basement Layout: Getting Started

After slightly losing interest in this project for a couple of weeks, the other day I decided I'm tired of waiting around and need to get started soon or I never will. I've got the long weekend for labor day coming up plus the rest of the week off for vacation, so I'm hoping to at least get the benchwork put together so I can start fiddling around with the sectional track I already have. 

The other night I got a bit of a head start and cleared out the space in my basement where the layout is going to be. I have the entire open area of the basement to myself, but I didn't want to go overboard with my first layout, so this one does not take up a ton of space relative to the whole basement. The taped off area is exactly the size of the benchwork plans, so you can get an idea of how it will fill the center of that side of the basement.

Taping off the area where the layout will be.
I chose to put it in the orientation its in so I can have the control panel at the end closest to the camera. Also, this way when you walk up to the layout you'll be able to see both sides of the divider. Not sure if that's the best thing or not yet, but it seems like a good idea for now.

I've also been slowly buying packs of Atlas code 83 track from the local hobby shop. I know I will need at least a few packs to get me going and its nice to spread out the purchases so I'm not dropping over $100 on track all at once. I will likely need to buy a couple more packs as well as some flex track. 

Some of the packs of track I've been buying lately.
Now I just need to make the first of a few trips to Home Depot to pick up the lumber i need for the benchwork. I'm going with 1x4's for the perimeter and primary stringers. The smaller secondary stringers will be 1x3's. The legs are going to be L-shaped and formed with two 1x4's for each leg. Beyond that, I just need to figure out what type and thickness of plywood to go with as well as what thickness foam to put on top.

Friday, August 21, 2015

Basement Layout: New Track Plan

Well, I realized I got myself in way over my head with the initial track plan for my basement layout and decided to blow it up and start over. The biggest issue was working out how to deal with the open center section and instead of having that I've opted to go with something a bit simpler to start. 

The new plan is basically a large rectangle with one main line loop. It is divided into two halves, one for the yard and the other for the town/industrial areas. I think this will be much more manageable as a starter layout. Now there is no lift out or duck under to deal with and it cuts down on the overall costs of the project. 

Here is the revised plan:

Mockup of the revised track plan in SCARM
The major element that I removed from the old design is the wye for turning trains around. That was just going to take up too much space, so I decided to go with a turntable instead. I'll have to deal with the complexities of wiring one up, but it will work much better in the space I have. 

I really like this plan and I hope the center divider idea will work as planned. It will help give the illusion that the trains go somewhere when leaving the town area. The overall table size is 66" x 144" so being able to reach the center shouldn't be a problem. Now I just need to stick with this and start working up how to build the benchwork.

I've started slowly buying packs of sectional track from the local hobby shop and even bought some lumber from Home Depot to get the benchwork going. I just need to find some time to get started, otherwise this will just turn into another project I never actually work on. I really want to be able to run some trains, so hopefully I can get to this sooner than later. I'd like to get some trains in motion before the end of 2015, but we'll see what happens.

Monday, July 27, 2015

New Project: Basement Layout

Ever since I bought my house back in 2013 I've wanted to build a nice sized layout in the basement. I'm lucky enough to have the entire open floor space of the basement for my trains and whatever else I want. Now that I've been here almost two years and I would really like to run some trains, I've decided to get serious about planning and building a basement layout. It will be slightly more ambitious than a simple 4x8 sheet of plywood with an oval, but nothing too crazy since this is the first layout I will have built on my own.

I have been working on some concepts in SCARM lately and came up with something that will fit into a nice open corner I have in my basement. It will be an open-center rectangle shape with one leg sticking off to accommodate a wye for turning trains around. Overall, the main rectangle is just over 14 feet long and 7 feet wide. The leg that sticks off is about 9 inches wide and 3 feet long. To access the center I plan on either doing a lift out or duck under on the right side, I just haven't decided which yet. The duck under is simpler, but may get annoying after a while.

I like this plan because it will allow me to just run trains along the one main line, but at the same time run some simple operations in the yard and on the industrial spurs.

Mockup of my basement layout concept in SCARM
I took the SCARM plan one step further and roughed out the design for the actual benchwork. I plan on using 1x4's for the perimeter frame with 1x3's as stringers in between. There will be seven main sections that I will bolt together in case I ever decided to move the layout.

A rough look at the plan for the benchwork
 Here are a couple of 3D previews from SCARM:

A preview of the yard side of the layout
A preview of the town/industrial spur side of the layout
Even though I am still working on the office shelf layout, and I plan to continue to do so, I want to get this started so I have somewhere to finally run some trains. I've even gone ahead and bought some lumber from Home Depot to get started. I just need to find some time one of these weekends to get going on the benchwork.

Saturday, July 4, 2015

Prototype Pic of the Day #22

D&M Alco C420 #976 | Image courtesy of David Hedlund via RailPictures.net
While it may be a few minutes into July 5th as I am writing this, I thought I would post a pic today of something showcasing the red, white and blue for the fourth of July. In the picture above is D&M Alco C420 #976 wearing it's bicentennial paint scheme. Other than the obvious departure from the standard D&M colors, this one has Detroit & Mackinac Railway spelled out in a fancy font and the words "Spirit of 76" were added to the sides of the cab.

Saturday, June 20, 2015

Structure Build: Walthers Commissary Building Part 10

While some of the updates to the commissary building have been shown in recent posts, this post will be all about the progress on just this structure. It's come along pretty well since the last time I did one of these posts back in December. I now have the roof and awning glued in place and have started mocking up and building the interior.

A look at the front of the commissary building with the awning added.
A look at the top with the roof glued in place.
Although this is supposed to just be a background building, it will be the main attraction on my office shelf layout, so I want it to be as detailed as possible. That said, I've been planning and working on building up the interior so it will be divided into three separate floors. I haven't really decided what will go on each floor, so for now I'm just focusing on getting the rough structure of everything in place.

To do this, I'm using sheet styrene for the floor on each level. The sheet representing the ground floor is held up by some floor joists that I made out of pieces of old cereal boxes and craft wood. Above that I used the same idea to make some walls that will hold up the second and third floors. 

A look at the back of the building showing the three floors in place.
A look at some of the end walls, the top has the printed texture applied to it.
For the ground floor, I searched online and found a nice concrete texture and just printed it off on plain printer paper. Then I glued it onto the styrene sheet and it looks pretty good so far. I'm planning on doing the same thing with the walls and remaining floors. I've never built anything like this before, so I'm kind of just winging it on a lot of this stuff and hoping it works out. Up next will be figuring out how to make a printed wall to stick on to the backdrop so you see more than just a blank sky blue wall when looking inside.

Wednesday, June 10, 2015

Railfanning the Lake State Railway

I've been on vacation this week and my wife and I decided to go up north for a couple of days to my family's cottage in Harrisville, MI. While we were there we took a trip up to Alpena for a few hours and I drove by the Lake State Railway facilities and was lucky enough to get a quick look at a pair of locomotives recently repainted into LSRC's latest paint scheme. This was the first time I'd ever seen the new paint scheme in person.

Fast forward a few hours and as we were heading into Harrisville, I drove over one of the crossings with LSRC's mainline between Alpena and Bay City. There in the distance I saw some headlights coming my way so I stopped off on the side of the road and waited for the train to come through. I remember watching plenty of D&M / LSRC trains go by this exact same crossing when I was a kid, so it was kind of neat to to be there again.

I'm not sure of the train ID or anything like that, but I do know I was able to get some pictures of LSRC #'s 303 and 4303. After some searching around the internet, I learned that these two are the first GP40-3 Road/Slug set for LSRC and the first two four-axle locomotives to receive the new paint scheme. Click here for a link to what I found on RailPictures.net. Since this is a railfanning post, I'll let the pictures do the rest, here they are.

A look at the crossing where I watched plenty of trains go by as a kid.
A closer look at the actual grade crossing (the modeler in me was interested in this kind of detail)
You can just barely see the lights coming in this picture.
A little bit closer now, this was a full six minutes after the picture above. It was a pretty slow train.
Another shot for the modeler in me. This is the area just to the north of the crossing.
Finally, a train and we're only six pictures into this.
In the front was LSRC #303
Here is a look at the connection between the two locomotives.
Here is a good look at #303 after it crossed the road.
A look at #4303 running behind #303
Some patched hopper cars that look to be pretty old.
Not sure what exactly to call these with the platforms on each end, but they look cool.
This wasn't completely planned out, so it was kind of nice to be able to get some railfanning in during my vacation. This is the first time I've actually taken pictures of a moving train out in the real world  in at least 15 years. The last time I did I was probably around 10 years old and having my parents take the pictures for me in this exact same location. It definitely has me wanting to get out and do some more though. I'll have to see if I can set aside some time specifically for railfanning the LSRC again the next time I'm up north.

Friday, June 5, 2015

Office Shelf Layout Update

Over Memorial day weekend I was finally able to get some more work done on this project. It's become several different mini-projects right now and I've just been bouncing back and forth between them without really focusing on one specific task. That's not the best way to get things done, but it works for me.

One of the mini-projects lately was building one of my switch stand kits. That part was pretty easy, it was fixing up the track that took the most time. Below is a look at the ties I cut from some old scrap track. The longer ones just have the tie plates and spikes sanded off. To get the wood grain look back I just ran the back of my xacto blade along the top.

Modifications to the turnout.
Once the ties were glued back in place, it was time to add the switch stand and brass rod to connect it to the rails. While I probably could've gotten a thinner piece of brass to look more prototypical, I just used what I had leftover from my road sign project a while back. It might look a little big, but that's fine with me and it is definitely an improvement over the way it looked before. I might be going overboard with some of these small details, but I like it.

A look at the modified turnout and nearly completed switch stand kit.
A look at the complete switch stand kit.
I love how this thing turned out, but now that I think about it, I wish I had not glued it to the ties before painting everything. Now it is stuck on the layout and I was worried about knocking into it, so I decided something needed to be done to protect it. That's why I glued a Dixie cup upside down over it.

Protection for the complete switch stand kit in the form of a Dixie cup.
Another small project was putting together and painting the Pikestuff loading dock kit. The kit went together pretty easily and should work just fine on the layout. This was another mockup I did in the past with cardboard and as the next picture shows, it is just about the exact same as what I already had made up.

Side by side of my mockup and the built up Pikestuff kit.
The tricky part about this was getting the end of the ramp section to meet up with the concrete pad I had leading into the ramp over the track. I ended up using my xacto knife to score the top side enough to where I could snap the end off, just like cutting any other piece of styrene. A little bit of sanding and it butted up nicely to the concrete pad.

A look at the chopped off end of the loading dock ramp.
Since the ramp was only three pieces (there was a back piece that I didn't use), I decided it would be a good idea to cut and glue in some styrene cross members to help keep the piece stable for cutting and sanding. They are never going to be seen and it was done with scrap styrene so it worked out nicely.

Styrene supports added to the underside of the ramp.
Test fitting the loading dock kit on the layout.
After getting the loading dock aligned with the cement pad leading up to it, I decided to paint the bottom edge the same color as the cement. I thought this would help make it look like the dock was built on top of existing cement. At least this way the color transition between the two looks a bit better.

Using Frog Tape to paint the bottom edge of the loading dock and ramp.
I did this with some Frog Tape and the results were pretty good. Here is how the side of the dock looks now. I really like how the loading docks match and are just different enough from the concrete areas to stand out. It would look strange if they were all the exact same color.

A look at the loading dock and ramp after being painted.
While progress has been pretty slow, I really like how this thing is coming along. My next project will probably be getting the DPM walls put together so I can paint them to match the commissary building. I've got a week of vacation starting Monday, so hopefully I can get some good modeling time in over the break and make some progress on this project.